Replacing the Maintenance Cartridge
To replace the maintenance cartridge in the PIXMA G620, follow the steps below.
 If the displayed message indicates that the maintenance cartridge is nearly full, promptly obtain a new one. If the maintenance cartridge becomes full, an error message is displayed and the printer stops working until it is replaced with a new one.
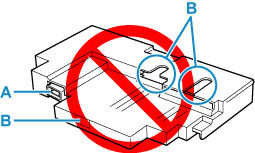
Don't touch the terminal (A) or opening (B) of the maintenance cartridge.
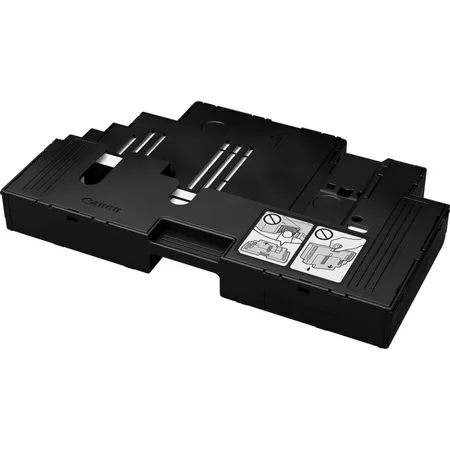
 When purchasing a new maintenance cartridge, its number is Maintenance Cartridge MC-G02.
-
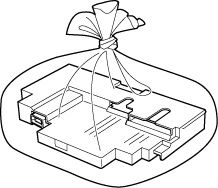
Remove the maintenance cartridge and the attached plastic bag from the package.
-
Turn the printer off.
-
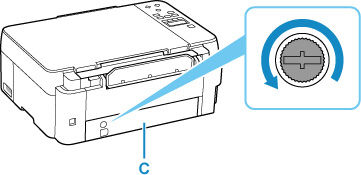
Unlock the coin screw from the maintenance cover (C).
-
Put your finger on the hole of the maintenance cover and remove it.
-
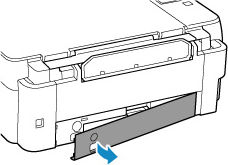
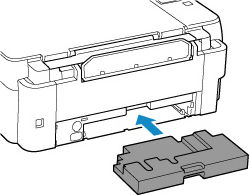
Pull out the maintenance cartridge until it stops.
-
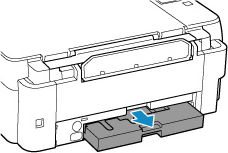
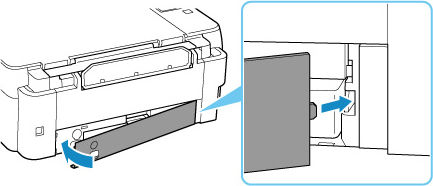
Gently lift the maintenance cartridge and pull it out.
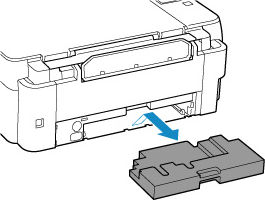
Be careful not to drop or place the removed maintenance cartridge on a desk or something. Dirt on the bottom may adhere to it or the ink inside may be scattered.
Put the used one immediately into the plastic bag attached to the new maintenance cartridge and seal the bag by tying the opening tightly to prevent the ink from leaking.
Do not put your hands inside the printer, as ink may adhere to your hands.
-
Insert the new maintenance cartridge straight until it stops.
-
Align the tab on the back of the maintenance cover with the hole on the printer and close it.
-
Insert the coin screw into the screw hole and turn it clockwise to secure.

-
Turn the printer on.